
Quick Summary
TL;DR: Drum compression controls the dynamic range of your drum sounds so they hit harder, sit tighter in the mix, and feel more intentional. This drum compression cheatsheet gives you immediate, genre-tested starting points for every element in your kit — kick, snare, clap, hi-hat, crash, tom, and percussion — so you stop guessing and start mixing.
Key Takeaways
- Attack time controls how much of the initial transient punch gets through before the compressor clamps down — get this wrong and your drums lose all their snap.
- Release time must breathe with the tempo of your track, or you'll hear pumping and unnatural surging between hits.
- A 4:1 to 5:1 ratio covers most drum compression needs; go higher only for parallel compression or special effects.
- Kick drums need a fast 4 ms attack and a 100 ms release to stay punchy without losing sub-bass weight.
- Snare drums benefit from a slightly slower 6 ms attack that lets the crack ring through naturally.
- Parallel compression (the New York Compression trick) is the single most effective technique for adding energy without killing dynamics.
- Over-compression is the most common beginner mistake — if your room bleed gets louder between hits, you've gone too far.
- Free and budget compressor plugins (TDR Kotelnikov, Variety of Sound's FerricTDS) are genuinely capable tools for home studio producers.
- EQ before compression removes problem frequencies so the compressor responds to the right signal.
- Sidechaining your kick into the bass or room mic is a fast, effective way to clean up low-end mud.
The Master Drum Compression Settings Matrix
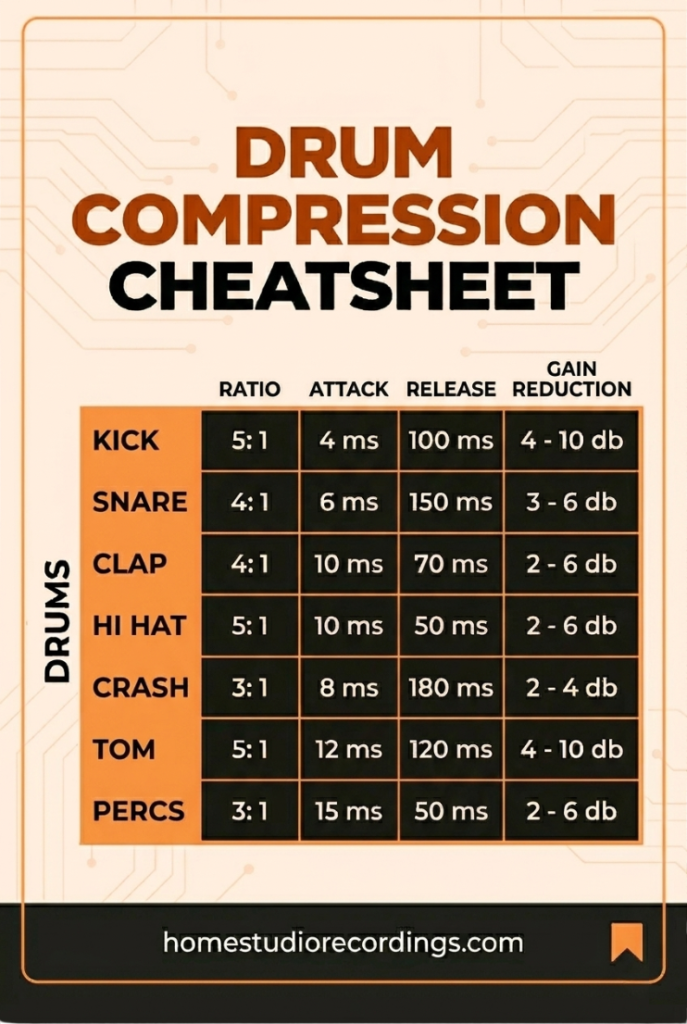
This is your go-to drum compression cheatsheet in table form. These are industry-standard starting points — not rules carved in stone, but reliable anchors that work across most modern genres.
| Drum Element | Ratio | Attack | Release | Gain Reduction |
|---|---|---|---|---|
| Kick | 5:1 | 4 ms | 100 ms | 4–10 dB |
| Snare | 4:1 | 6 ms | 150 ms | 3–6 dB |
| Clap | 4:1 | 10 ms | 70 ms | 2–6 dB |
| Hi-Hat | 5:1 | 10 ms | 50 ms | 2–6 dB |
| Crash | 3:1 | 8 ms | 180 ms | 2–4 dB |
| Tom | 5:1 | 12 ms | 120 ms | 4–uki 10 dB |
| Percs | 3:1 | 15 ms | 50 ms | 2–6 dB |
💡 Pull quote: "Start with these numbers, then trust your ears. The cheatsheet gets you in the ballpark — your ears get you to the finish line."
What Exactly Is Drum Compression and Why Do You Need It?
Drum compression is the process of automatically reducing the loudest peaks in a drum signal so the overall sound becomes more controlled, consistent, and powerful in the mix. Without it, a hard snare hit might jump 10 dB louder than the rest of the performance, creating an uneven, unprofessional result.
Here's the core idea: a compressor watches the incoming audio signal. When that signal crosses a set level (the threshold), the compressor turns it down by a specific amount (the ratio). You then use make-up gain to bring the overall level back up — and suddenly the quiet hits are louder, the loud hits are tamed, and everything feels glued together.
For bedroom producers, drum compression is especially critical because programmed drums from sample packs and drum machines often have wildly inconsistent velocity levels. Compression evens that out fast.
Breaking Down Individual Drum Elements
How Do You Compress a Kick Drum for Maximum Punch?
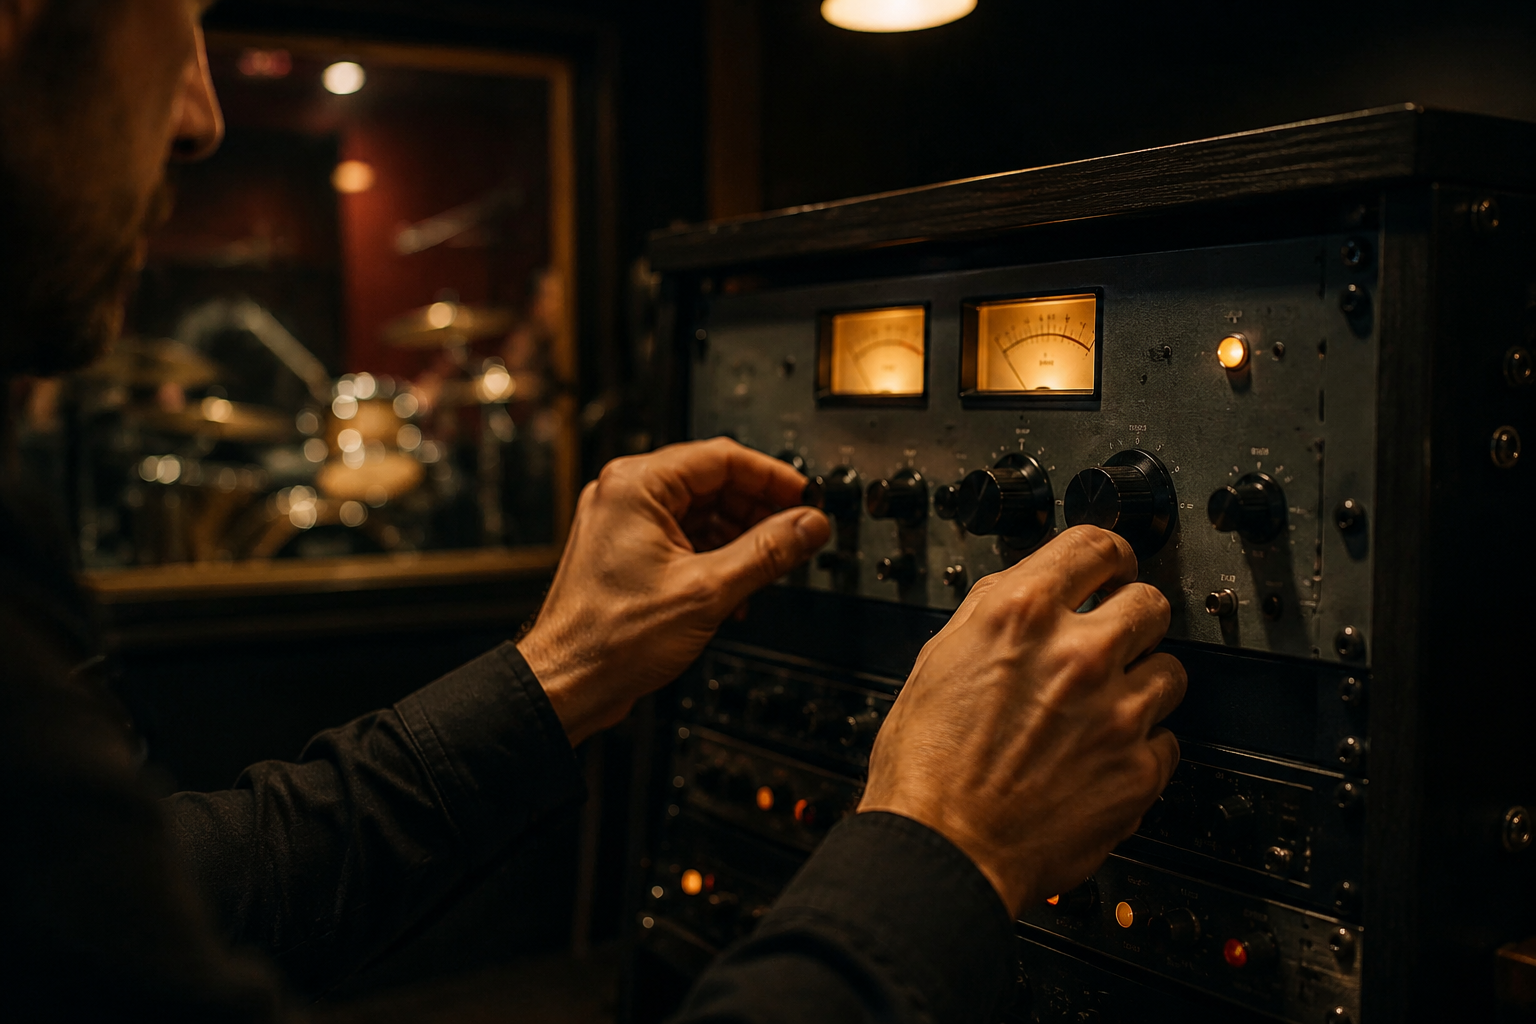
To compress a kick drum correctly, use a 5:1 ratio with a fast 4 ms attack and a 100 ms release, targeting 4–10 dB of gain reduction. This grabs rogue peaks without destroying the transient click that gives the kick its punch.
The key detail most people miss: if your kick starts sounding thin or loses its low-end weight, slow the attack down toward 10 ms. That extra few milliseconds lets the natural "thud" of the beater pass through uncompressed before the compressor kicks in.
- For hip-hop and trap: Push gain reduction toward 8–10 dB for a tighter, more controlled sub.
- For rock: Keep it at 4–6 dB to preserve the live, dynamic feel.
- Mic choice matters too — check out the best kick drum microphones to make sure you're capturing the right signal before compression even enters the picture.
What Are the Best Compression Settings for a Snare Drum?
For a crisp, present snare, use a 4:1 ratio, a 6 ms attack, and a 150 ms release, aiming for 3–6 dB of gain reduction. The slightly slower attack compared to the kick lets the initial crack ring through naturally before the compressor clamps down.
That 150 ms release is doing something clever: it allows the snare wire ring (the "sizzle" on the tail) to naturally swell upward as the compressor lets go. The result is a snare that sounds bigger and more alive in the stereo field.
Common mistake: setting the release too short (under 50 ms) on a snare causes the compressor to reset mid-ring, creating an unnatural choked sound. This trips up a lot of beginners.
Managing Transients on Claps, Hi-Hats, and Overhead Crashes
Claps are sharp and percussive. A 4:1 ratio with a 10 ms attack keeps the initial hand-clap transient crisp, while a 70 ms release ensures the compressor resets cleanly before the next beat.
Hi-hats bleed into everything. Use a 5:1 ratio with a 10 ms attack and 50 ms release, keeping gain reduction light at 2–6 dB. The goal here is smoothing out harshness, not squashing dynamics.
Crash cymbals need room to breathe. A gentle 3:1 ratio with an 8 ms attack and 180 ms release tames the initial spike without killing the natural swell and decay that makes crashes feel real.
The 4 Core Pillars of Audio Compression Explained
Before diving into advanced techniques, make sure these four concepts are locked in. Every setting on your drum compression cheatsheet connects back to one of these.
1. Ratio Dictates how aggressively the compressor reduces the signal once it crosses the threshold. A 5:1 ratio means for every 5 dB the input exceeds the threshold, only 1 dB comes out. Higher ratios = more aggressive control.
2. Attack Time (ms) The speed at which the compressor starts clamping down after the signal crosses the threshold. Shorter attack times (under 5 ms) control sharp transients tightly. Longer attack times let the initial snap pass through unaffected — which is often what you want for drums.
3. Release Time (ms) How long it takes for the compressor to let go after the signal drops back below the threshold. This needs to breathe with your track's BPM. A release that's too slow causes pumping; too fast causes unnatural choppiness. Use the BPM to milliseconds calculator to sync your release time to your tempo.
4. Gain Reduction (dB) The visual readout on your compressor's VU meter showing how much the signal is being turned down. Aim for the ranges in the cheatsheet table above — if the needle is buried, you're over-compressing.
For a deeper look at how compression interacts with EQ, the Ultimate EQ Frequency Cheat Sheet is a great companion resource.
Pro-Level Drum Compression Techniques
Parallel Compression (The New York Compression Trick)
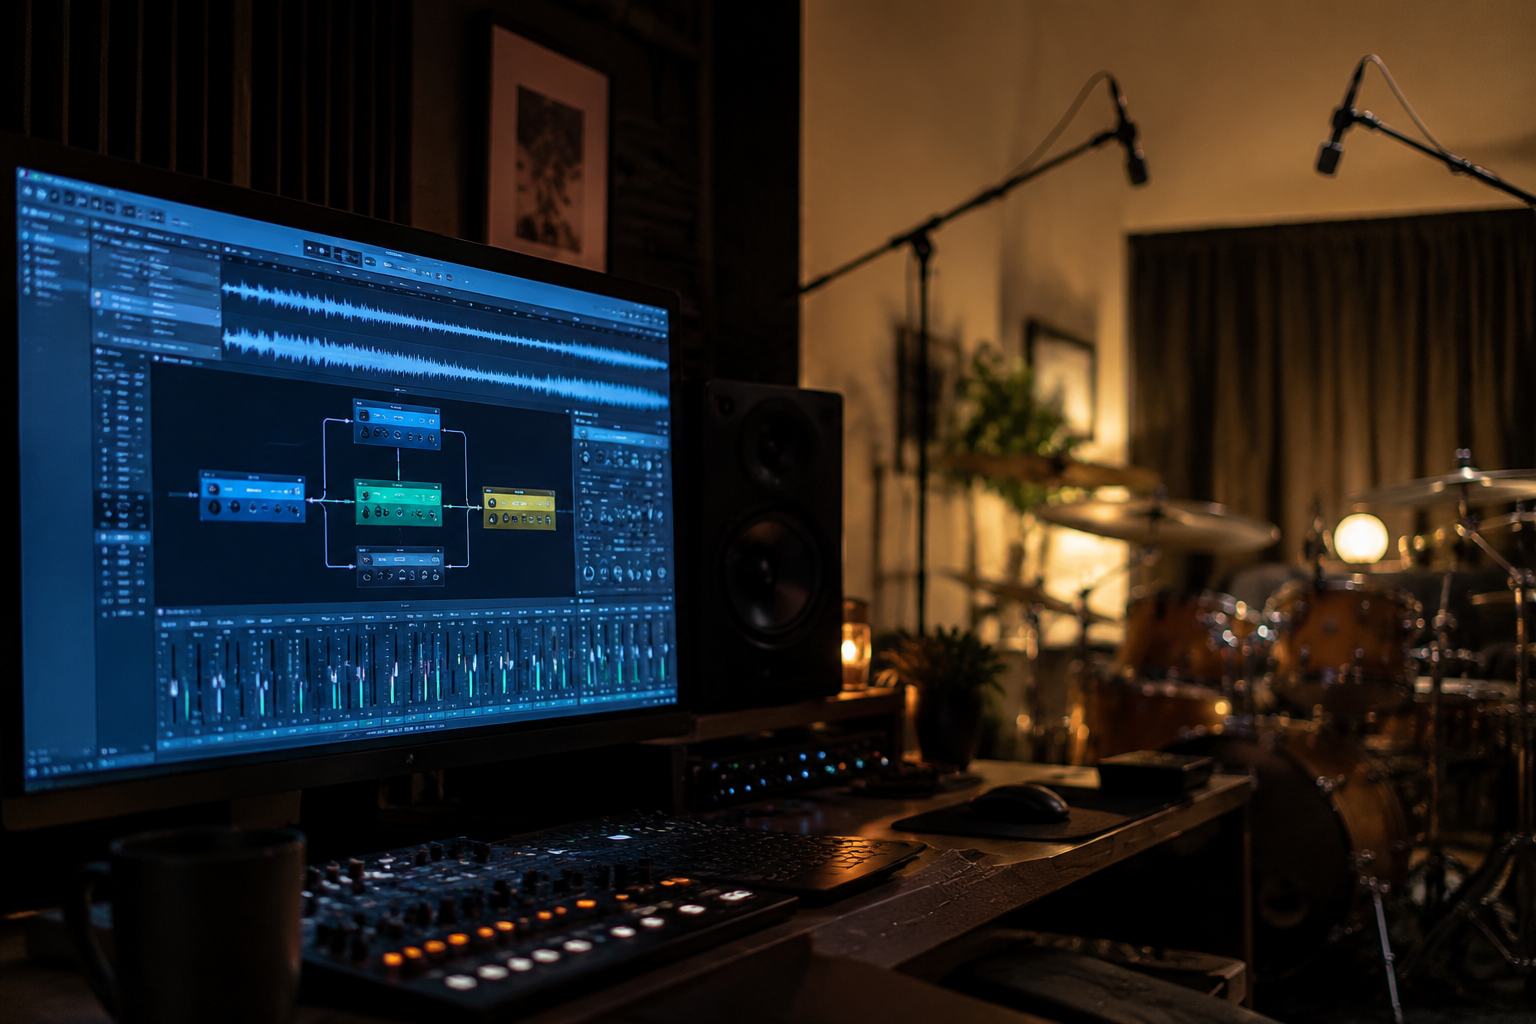
Parallel compression is one of the most effective techniques in modern drum mixing. Here's how it works: you duplicate your drum bus, crush the duplicate track aggressively (high ratio, fast attack and release, 10+ dB of gain reduction), then blend it quietly underneath the dry, uncompressed mix.
The result is massive energy and density without killing the natural dynamics of the performance. The dry signal keeps the life and punch; the crushed signal adds weight and sustain underneath.
In 2026, the go-to approach for parallel compression also includes a high-pass filter (HPF) on the compressed parallel track, cutting below around 80–100 Hz. This keeps the kick drum's sub-bass from doubling up and getting muddy when the two signals blend together.
Steps to set it up:
- Create a duplicate of your drum bus or send the drums to an aux channel.
- Apply heavy compression to the duplicate (ratio 8:1 or higher, fast attack, 10–15 dB of reduction).
- Add a high-pass filter at 80–100 Hz on the compressed channel.
- Blend the compressed signal in slowly until you hear the drums thicken up.
- Stop before it starts pumping.
Sidechaining the Kick and Low-End Elements
Sidechaining feeds the kick drum's signal into the sidechain input of your bass guitar, synth bass, or drum room mic. Every time the kick hits, the bass automatically ducks out of the way, clearing space for the kick's low end to punch through cleanly.
This is one of the fastest ways to fix a muddy low end in a home studio mix. For a full walkthrough of how to set this up in your DAW, the complete guide to sidechaining covers the routing step by step.
How Different Are Compression Settings for Kick Versus Snare Drums?
The difference is significant, and getting it wrong is one of the most common mixing mistakes. Kick drums need a faster attack (4 ms) to control the low-end boom, while snare drums need a slightly slower attack (6 ms) to let the crack cut through before compression engages.
Release times differ even more: kick drums use a 100 ms release to let the sub-bass tail breathe, while snare drums use a longer 150 ms release to enhance the natural wire ring and make the snare sound bigger.
Choose a faster attack if: the drum element has a sharp, percussive transient you need to tame (kick, clap). Choose a slower attack if: you want the natural snap of the hit to punch through the mix (snare, tom).
Can You Use the Same Compression Settings for Rock and Jazz Drums?
No — and this is where a lot of home studio producers get stuck. Rock drums need more aggressive compression (higher ratios, more gain reduction) to sound tight and controlled in dense mixes. Jazz drums need minimal compression, if any, to preserve the natural dynamics and subtle brush strokes that define the genre.
| Genre | Ratio | Gain Reduction | Goal |
|---|---|---|---|
| Rock / Metal | 5:1–8:1 | 6–10 dB | Tight, punchy control |
| Pop / R&B | 4:1–6:1 | 4–8 dB | Polished, consistent |
| Jazz / Acoustic | 2:1–3:1 | 1–3 dB | Natural, dynamic |
| Hip-Hop / Trap | 6:1–10:1 | 8–12 dB | Dense, heavy-hitting |
The drum compression cheatsheet settings in the master table above are calibrated for modern pop and rock production. Adjust ratios and gain reduction down significantly for jazz, acoustic, and folk recordings.
Is Drum Compression Good for Bedroom Producers or Just Pro Studios?
Drum compression is just as essential for bedroom producers — arguably more so. Professional studios capture drums in acoustically treated rooms with high-end microphones, which naturally produces more consistent, balanced recordings. Bedroom producers are usually working with sample packs, drum machines, or home recordings with inconsistent dynamics and room bleed.
Compression is the tool that fixes all of that. And you don't need expensive hardware to get great results. The techniques in this guide work just as well with free plugins as they do with a $3,000 hardware compressor.
Which Drum Compressor Plugins Are Recommended for Beginners?
For beginners, the best drum compressor plugins are the ones that are simple, transparent, and free or low-cost. Here are reliable starting points:
Free options:
- TDR Kotelnikov — clean, transparent, great for drum bus glue
- Variety of Sound FerricTDS — adds warmth and character to individual drum hits
- Analog Obsession LALA — smooth optical-style compression for overheads and room mics
Paid options (budget-friendly):
- Waves CLA-76 (frequently on sale under $30) — FET-style, perfect for snare and kick
- Plugin Alliance SSL G-Master Bus Compressor — the go-to VCA compressor for drum bus glue
- Softube FET Compressor — versatile and musical across all drum elements
Choose a VCA-style plugin (SSL G-Bus type) for the drum bus. Choose a FET-style plugin (1176 type) for individual kick and snare tracks. This combination covers 90% of drum compression needs in a home studio.
For more on building your DAW toolkit, the best DAW software guide for 2026 covers which platforms these plugins integrate with most smoothly.
How Do You Know If You're Over-Compressing Your Drum Tracks?
Over-compression is the most common beginner mistake, and it's easy to spot once you know what to listen for. Your drums are over-compressed if:
- The punch disappears — hits feel soft and lifeless instead of impactful.
- Room bleed gets louder between hits — the compressor is pumping up the noise floor.
- Cymbals swell unnaturally after each hit, surging in volume as the compressor releases.
- The mix feels exhausting to listen to — over-compressed drums create listener fatigue fast.
The quick test: bypass the compressor entirely. If the drums sound more alive and punchy without it, you've been over-compressing. Dial back the ratio or raise the threshold until you're only catching the loudest peaks.
Also pair compression with volume automation to handle level inconsistencies manually before reaching for heavier compression.
Can Drum Compression Fix Sloppy Playing or Weak Drum Recordings?
Compression can help, but it's not a rescue tool for fundamentally broken recordings. It can even out inconsistent velocities in programmed drums and tighten up the feel of a slightly loose performance — but it can't fix timing issues, fix a poorly tuned drum, or salvage a recording with excessive room noise or phase problems.
What compression can fix:
- Inconsistent hit velocities in programmed drums
- Overly dynamic live performances where some hits are too quiet
- Harsh transient peaks that cause distortion or clipping
What compression cannot fix:
- Off-tempo or sloppy playing
- Poor mic placement or phase cancellation
- Excessive room reverb or background noise (use a noise gate for that)
The golden rule: get the best possible recording first. Compression is a shaping tool, not a repair tool.
What Threshold and Ratio Settings Work Best for Tight Drum Sounds?
For tight, controlled drum sounds, set your threshold so the compressor engages on the loudest 20–30% of hits, not every single one. A ratio between 4:1 and 6:1 covers most situations — this range controls dynamics without completely flattening the performance.
Practical threshold-setting method:
- Start with the threshold fully raised (no compression).
- Slowly lower the threshold until the gain reduction meter moves 3–4 dB on average hits.
- For tight control, aim for 4–6 dB on average hits, 8–10 dB on the loudest hits.
- If the meter is moving constantly on every single transient, raise the threshold slightly.
The goal is selective compression — catching the peaks while letting the natural dynamics breathe underneath.
What's the Difference Between Parallel and Standard Drum Compression?
Standard (serial) compression processes the entire drum signal through the compressor — what comes out is the compressed version only. Parallel compression blends the compressed signal with the original dry signal, preserving the natural transients while adding density and sustain underneath.
| Standard Compression | Parallel Compression | |
|---|---|---|
| Signal path | Dry signal replaced by compressed signal | Dry + compressed signals blended |
| Transient preservation | Reduced | High |
| Best for | Controlling individual elements | Adding energy to the full drum bus |
| Risk | Over-compression, lifeless drums | Phasing issues if not aligned |
Parallel compression is the technique that makes professional drum mixes sound simultaneously controlled and explosive. It's worth learning early.
Advanced Drum Compression Techniques for Pro Mixers
Once the basics are locked in, these techniques separate good mixes from great ones.
Transient shaping before compression: Use a transient shaper plugin (like Waves Smack Attack or the free Flux BitterSweet) to manually sculpt the attack and sustain of drum hits before they even reach the compressor. This gives you more precise control than attack and release knobs alone.
Multi-band compression on the drum bus: Apply compression only to specific frequency ranges — for example, compressing only the low-mids (200–500 Hz) to control boxiness without affecting the high-frequency snap of the cymbals.
Compression automation: Automate the threshold or ratio throughout the song so the compression responds differently in the verse versus the chorus. Choruses often need tighter compression; verses can breathe more freely.
Drum bus saturation after compression: Adding subtle tape saturation or harmonic distortion after the compressor adds glue and warmth that makes the drums feel like they were recorded to analog tape — even in a completely digital home studio setup.
For more on how these techniques interact with the full mix, the guide on how to make vocals sit in the mix covers complementary techniques for the elements sitting above your drums.
Interactive Drum Compression Settings Finder
🥁 Drum Compression Settings Finder
Frequently Asked Questions
Q: Should I compress drums before or after applying EQ? A: Apply EQ before compression to cut problem frequencies (like muddy low-mids) so the compressor responds to a cleaner signal. Apply EQ after compression to restore brightness or presence that the compression reduced. Both approaches are valid — the order depends on what problem you're solving.
Q: What is the best type of compressor plugin for a drum bus? A: VCA-style compressors (modeled after the SSL G-Master Bus Compressor) are the standard choice for drum bus glue because of their fast, cohesive response. For individual kick and snare tracks, FET-style compressors (modeled after the Universal Audio 1176) add character and harmonic drive that makes individual hits feel more alive.
Q: How do I know if I've over-compressed my drums? A: Your drums are over-compressed if they sound lifeless and flat, if room bleed gets louder between hits, or if cymbals swell unnaturally after each strike. Bypass the compressor — if the drums immediately sound more punchy and alive, dial back the compression.
Q: How much compression is too much on a drum bus? A: More than 4–6 dB of gain reduction on the full drum bus is generally too much for most genres. At that point, you're compressing the whole kit as a unit, which can make the mix feel claustrophobic. Use 1–3 dB on the bus for glue, and handle heavier compression on individual tracks.
Q: Do I need to compress programmed drums from sample packs? A: Yes — often more than live drums. Sample packs contain hits recorded at fixed velocities, and MIDI velocity variations can create uneven dynamics that feel mechanical. Light compression (3:1, 4–6 dB reduction) evens out the performance and makes programmed drums feel more human and consistent.
Q: What's the difference between a compressor and a limiter for drums? A: A compressor gently reduces peaks above the threshold based on the ratio setting. A limiter is essentially a compressor with an extremely high ratio (often 20:1 or infinity:1) that acts as a hard ceiling, preventing any signal from exceeding a set level. Use compression for shaping drum dynamics; use limiting at the end of the chain to prevent clipping.
Q: Should I compress the overhead mics the same way as the close mics? A: No. Overheads capture the full kit in a room, so they need gentler compression (2:1–3:1, 2–4 dB reduction) with a slower attack to preserve the natural ambience and cymbal bloom. Aggressive compression on overheads creates pumping and makes the room sound unnatural.
Q: Can I use the drum compression cheatsheet settings in any DAW? A: Yes. These settings are plugin-agnostic and work in any DAW — Logic Pro, Ableton Live, FL Studio, Pro Tools, or GarageBand. The parameter names (ratio, attack, release) are universal across all compressor plugins.
Q: What's the fastest way to improve my drum compression without learning every parameter? A: Focus on attack and release first — they have the biggest impact on how drums feel. Set attack to 4–10 ms, release to 80–150 ms, ratio to 4:1, and threshold until you see 4–6 dB of gain reduction. That single setup will get you 80% of the way there on almost any drum sound.
Q: How does drum compression interact with mastering? A: Heavy drum compression at the mix stage limits what the mastering engineer can do. Leave 3–6 dB of headroom on your drum bus and avoid over-compressing at the mix stage. The mastering chain will add its own glue and limiting — your job is to deliver a dynamic, punchy mix, not a pre-mastered one. For more on this, the guide on what mastering actually does breaks down the full picture.
Conclusion
Drum compression doesn't have to be intimidating. With this drum compression cheatsheet as your starting point, you have concrete, tested numbers for every element of the kit — no more guessing, no more over-compressing, no more lifeless mixes.
Here's your action plan:
- Open your current project and pull up a compressor on your kick drum track.
- Dial in the cheatsheet settings from the master table above (5:1 ratio, 4 ms attack, 100 ms release).
- Set the threshold until you see 4–6 dB of gain reduction on average hits.
- Repeat for snare, hi-hats, and overheads using the settings for each element.
- Set up a parallel compression channel on your drum bus and blend it in at low volume.
- Bypass everything and compare — if the compressed version sounds more controlled and powerful, you're on the right track.
The settings in this guide are starting points, not endpoints. Your ears are the final judge. Start here, trust the numbers, then let the music tell you where to go next.


