

This tutorial is a beginner's guide to recording your music at home on your computer. We will be going through the process of recording an acoustic guitar, MIDI keyboard/piano, and vocals.
What equipment do you need to record your own music at home?
We recently shared a post about what equipment you’ll need to start recording at home.
Just to recap here is the list of recording equipment that you will need to record a song at home:
1. Computer
The first and foremost requirement for home recording is a reliable computer. Your computer will serve as the heart of your home recording studio, handling all the processing and storage necessary for recording and editing your music. When choosing a computer for recording, it's important to consider its specifications.
Key Points:
- Ensure that your computer has sufficient RAM memory to handle the demands of running a DAW smoothly.
- Look for a computer with a fast processor and ample storage space to store your audio files.
- Consider the operating system compatibility with the DAW software you plan to use.
For more information about computer specs checkout our guide: Computer Specifications for Music Production.
2. Digital Audio Workstation (DAW)
A Digital Audio Workstation (DAW) is a software application that allows you to record, edit, and mix your music digitally. It provides a comprehensive set of tools and features for creating professional-quality recordings.
There are several popular DAWs available, such as:
- GarageBand (free)
- Logic Pro (paid)
- Cubase (paid and free)
- Pro Tools (paid and free)
- Ableton Live (paid)
- and more.
Using a combination of a computer and a DAW, you can create a powerful and versatile home recording setup. These two components form the foundation of your home recording studio, allowing you to record, edit, and produce your music with ease.
Key Points:
- Choose a DAW that suits your needs and budget. Some DAWs offer free or trial versions, while others require a purchase.
- Familiarize yourself with the user interface and workflow of the chosen DAW to maximize your productivity.
- Explore the different features and plugins offered by the DAW to enhance your recording and mixing process.
3. Audio Interface
An audio interface serves as the bridge between your computer and other audio devices, allowing you to capture and process sound. It acts as both an analog-to-digital converter (ADC) and a digital-to-analog converter (DAC), ensuring that the audio signal remains accurate throughout the recording process.
Choosing the Right Audio Interface
When selecting an audio interface, consider the number of inputs and outputs you require, the type of connections (USB, Thunderbolt, or FireWire), and the audio quality it provides. Look for interfaces with low-latency performance to minimize delays during recording and monitoring.
One of the most popular choices of audio interfaces for home recording is the Focusrite 2i2. It offers high-quality preamps, good sound quality, and is easy to use.
4. Microphones
Microphones play a crucial role in capturing the nuances and details of your vocals and instruments. They come in various types, each with its own characteristics and applications. Choosing the right microphone for your recording needs is essential to achieve the desired sound.
Dynamic Microphones
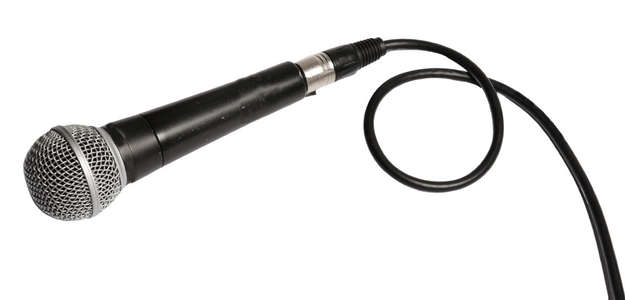
Dynamic microphones are commonly used for recording vocals and live performances. They are rugged, versatile, and can handle high sound pressure levels (SPL), making them suitable for capturing loud instruments such as drums and electric guitars. Dynamic microphones are also less sensitive to background noise, making them ideal for recording in less controlled environments.
Condenser Microphones

Condenser microphones are known for their sensitivity and accuracy, making them an excellent choice for capturing vocals and acoustic instruments. They require phantom power, usually supplied by the audio interface, and offer a wider frequency response compared to dynamic microphones. Condenser microphones are commonly used in professional recording studios for their detailed and transparent sound reproduction.
Ribbon Microphones

Ribbon microphones are known for their smooth and vintage sound character. They excel in capturing the subtleties of acoustic instruments, vocals, and guitar cabinets. Ribbon microphones are delicate and require careful handling, as they are sensitive to physical shocks and high SPL. They are often used in professional recording environments to add warmth and depth to the recorded sound.
5. Headphones and Monitors
Having a reliable set of headphones and monitor speakers is essential for accurate sound monitoring and playback during the recording process. Headphones allow you to listen to your music up close and focus on the details, while monitor speakers provide a more natural and immersive listening experience.
Types of Headphones
There are two main types of headphones: closed-back and open-back.
- Closed-back headphones offer better isolation from external noise and prevent sound leakage, making them ideal for tracking and recording.
- Open-back headphones provide a more spacious and natural sound reproduction, making them suitable for mixing and critical listening.
Choosing Monitor Speakers
When selecting monitor speakers, it's important to consider factors such as frequency response, clarity, and accuracy. Near-field monitors, which are designed for close listening, are commonly used in home recording studios. Look for monitors that have a flat frequency response, meaning they don't overly emphasize or attenuate certain frequencies, allowing you to hear your music as accurately as possible.
6. Cables and Accessories
In addition to the main recording gear, there are a few essential cables and accessories you'll need to connect your equipment and optimize your recording setup.
Cables
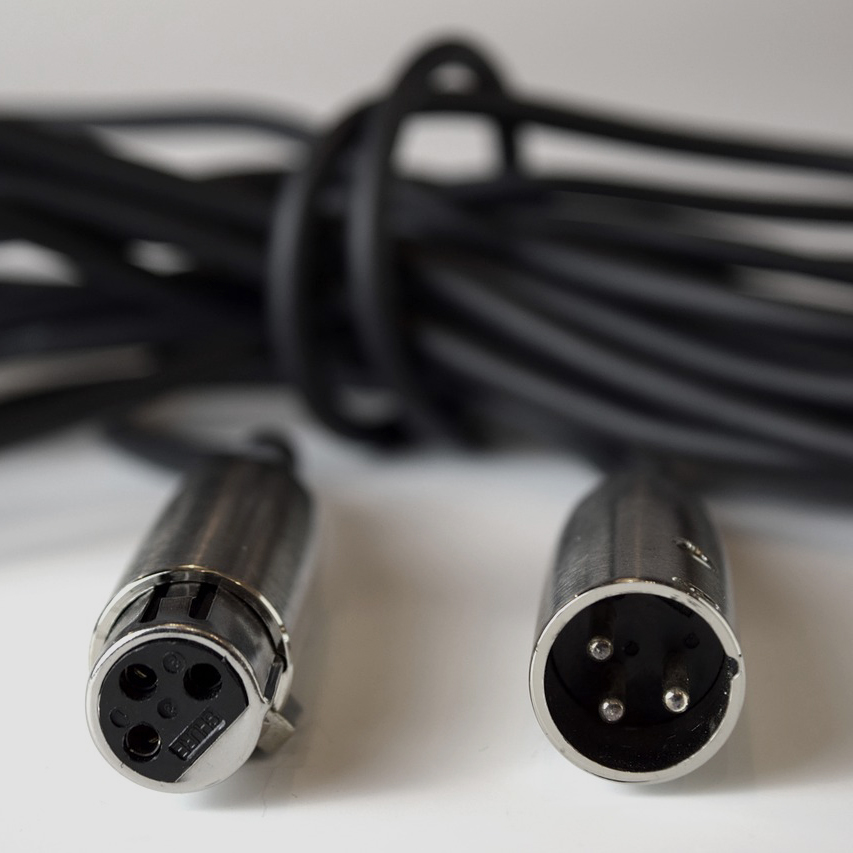
Investing in high-quality cables is crucial for maintaining signal integrity and minimizing interference. XLR cables are commonly used for connecting microphones and audio interfaces, while instrument cables are used for connecting guitars, keyboards, and other instruments. Make sure to choose cables of adequate length and durability to suit your needs.
Microphone Stand and Pop Shield
A sturdy microphone stand is essential for securely positioning your microphone during recording sessions. Look for stands that offer adjustable height and stability to accommodate different recording scenarios. Additionally, using a pop shield, also known as a pop filter, can help reduce plosive sounds caused by air blasts when singing into the microphone. It effectively filters out unwanted popping noises, resulting in cleaner vocal recordings.
Other Accessories
Other useful accessories for home recording include a reflection filter, which can help reduce room reflections when recording vocals, and a MIDI controller for playing virtual instruments and controlling your digital audio workstation (DAW). Additionally, investing in a reliable surge protector or power conditioner can help protect your equipment from power surges and ensure stable operation.
Setting Up Your Home Recording Studio
Setting up an as professional recording studio at home as you can is important for achieving high-quality results. This section will guide you through the process of choosing the right room, implementing acoustic treatment, and selecting essential equipment.
Choosing the Right Room for Recording
When selecting a room for your home recording studio, consider factors such as size, shape, and isolation. Ideally, choose a room with enough space to accommodate your equipment and instruments comfortably. The shape of the room can affect the acoustics, so opt for a rectangular or square room rather than irregular shapes.
Acoustic Treatment and Soundproofing
To ensure optimal sound quality in your home recording studio, it's important to implement proper acoustic treatment and soundproofing measures. Acoustic treatment involves using materials like diffusers, absorbers, and bass traps to control sound reflections and create a balanced sonic environment. For more information about acoustic treatment, check out our guide: Acoustic Treament for Home Studios.
Soundproofing aims to prevent sound from escaping the room or external noise from entering. Use techniques like adding mass to walls, sealing gaps and cracks, and using soundproof curtains or panels to minimize unwanted noise.
Related:
How to Choose an Audio Interface for Home Studio – Buying Guide
Best Vocal Mic for Home Studio (Top 8) – Condenser vs. Dynamic
The Recording Process - 9 Step Guide
If you have the studio equipment (listed above) set up, the first thing you should do before you start actually recording is to just get to know your equipment and get to know your recording software.
Some of it’s just going to be a learning process along the way. But there is nothing worse than just not knowing how anything works on your software. So as boring as it is, sit down with the manual to at least learn the basics.
There’s going to be screenshots inserted into this post as we go through this 'how to record a song tutorial' which are specific to the Pro Tools DAW (recording software). But I'm not going to be going into to much detail about Pro Tools because some of you might not be using that software and we don't want to make it too confusing. If things look different on your recording software don’t worry because, to be honest, they’re all quite similar across the board.
Here is a link to a free version of the Pro Tools Recording Software called Pro Tools First if you want to follow along with this tutorial using the software.
If you are using Garageband you may prefer to check out this tutorial: How to use Garageband on a Mac – Beginners Guide
Step 1 - Set up your DAW Software
When you're creating your new session you will have to choose where to save it on your computer, so choose wherever you want it to be.
You'll also notice some little numbers under the words sample rate and bit depth and some different formatting that you can choose. I'm not really going to get into the details about what those mean because I'm just trying to keep this as basic as possible for now. The standard settings that you should use though are 44.1kHz for Sample Rate and 24 Bit for Bit Depth. So set it at that and you should be good to go.
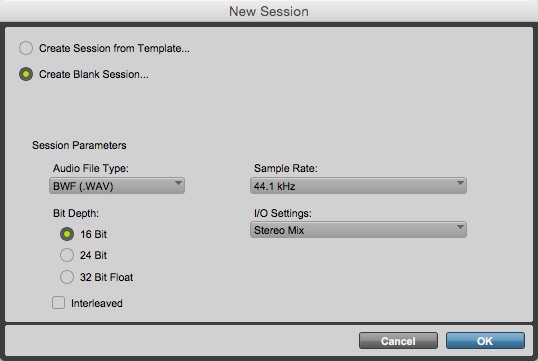
It's also recommended that you use WAV or AIFF Audio File Type that is .WAV or .AIFF, it's just the most widely compatible format.
So once you're set you can click ok this will then open your new session. Before you start creating new tracks you will need to check that software is seeing and using the correct audio interface. On Pro Tools, you go to Setup>Playback Engine on other Daw Software it maybe settings/devices/preferences or something along those lines. When you're there you need to set up your audio interface as the input and output for your recording software so that it knows that it has to send and receive audio to and from your audio interface.
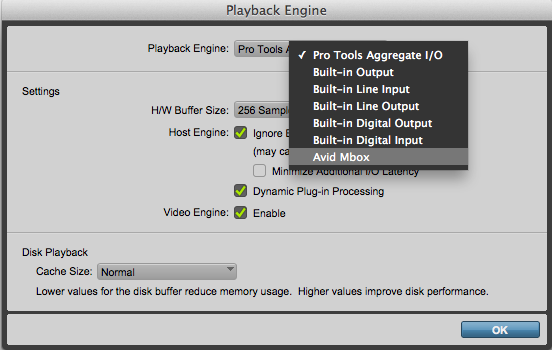
On the playback engine/input dropdown you should select your audio interface and on the output section (if it has one, Pro Tools doesn't) you should also select your audio interface. So the software is now using your audio interface to record from and playback your song.
The DAW Software Interface
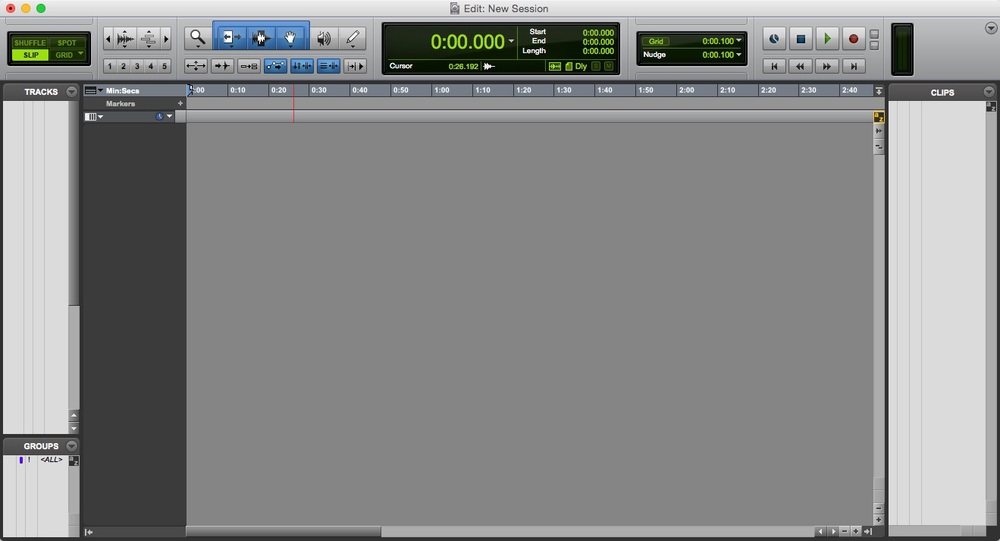
To start off you should have the main blank project window where all your tracks will be laid out and this is where you're going to be doing most of your work.
Then you’ll have a mixer window and this will have all the different audio levels and panning as well as all the plugins you can use to add effects on those tracks.
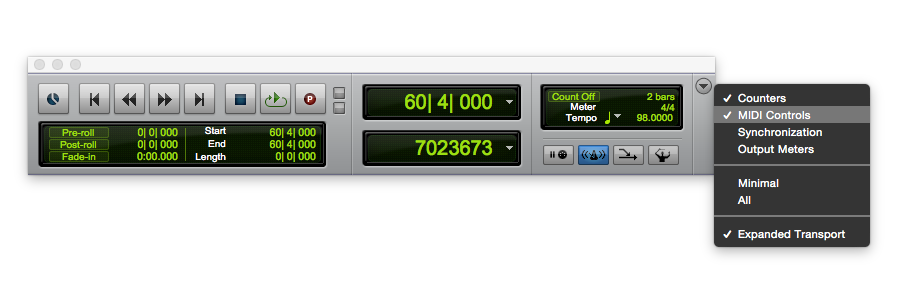
Somewhere in your main project window, you’ll have a transporter and this is the time counter that says where you are in your session. It gives you the controls you need to navigate around the session. It’ll also have your tempo.
One other thing you should actually check before you start setting up the session is that everything is plugged in correctly. Also if you’re using a condenser microphone you’ll also want to make sure that phantom power is turned on on your audio interface. Usually, this is a little switch that says plus 48v or something like that. It's basically just a power supply that powers your microphone.
Step 2 - Creating audio tracks
Let's imagine that you want to record a guitar and vocal with microphones. So for this, you will want to create 2 mono audio tracks which are what we will be recording our audio onto. Go to the track/s menu and select new audio track and then select audio input and 2 as your number of tracks.

In case you don't know, mono means a track that has one audio signal and stereo means it has two audio signals left and right.
Step 3 - Set up your audio inputs
In your mixer window, you should now see two audio input tracks and on each audio track, you should see a little spot that says input and that’s basically where that track is recording from. So you’ll want to set that up to whatever input your microphone is coming in on from your audio interface.

Step 4 - Setting your input levels
Next, you can record enable your track by clicking the R or record icon on the track you want to record in the main project window. Your track is now listening to the incoming audio and ready to record, as soon as you hit record in the transport section at the top of the window. But it's not recording yet it’s just listening.
You should now see the input signals coming into your software (DAW) so you're going to want to check your input levels are correct. You don’t want to be recording too loud or too quiet.
So on your audio interface, there will be a little dial that says mic gain or something similar. This controls how much sound is actually coming out of the microphone.
So a good rule of thumb is if you see the signals on your track about 1/2 or even 3/4 of the way up then that's probably a good safe zone. You're going to want to leave yourself a little room above where you see the signal reaching and the top of the bar. We call this headroom and it’s basically like if you play a chord louder than normal or sing a word louder than normal it’s not going to go too loud and start going into the red, peaking, or distorting.

Ok, so now you have your levels all set and hopefully, things are sounding good.
Step 5 - Setting up the click track/metronome
If you want to record at a particular tempo and keep everything in time then now would be a good time to set up our click track (metronome).
In Pro Tools to create a click track you go 'track menu' at the bottom of the 'track menu,' you'll see 'create click track' and enable it. You should now have a click track in your tracks if you now press play you should hear the metronome playing.
One thing you might also need is a couple of bars count off before you start recording. To do this click where it says 'count off' in the transport section and it will then be activated (highlighted green). You can then choose how many bars count off you want to the right of it. In the picture below it's set to a 2 bars count off.

If you want to change the tempo of the click track the way that you do that is by pressing Alt (Option) and the number 2 on your keyboard and this will bring up the Tempo Change pop up window.
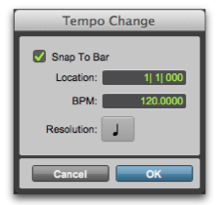
Now here you can either change the value by typing it in or you can use the letter 'T' on your keyboard to tap the tempo that you want. In the picture above the tempo is set to 120 beats per minute. Once you're happy with the tempo we're going to hit OK.
Step 6 - Positioning your mic on your acoustic guitar
It can take a little bit of time to figure out what you actually like and where you think it sounds good on certain instruments. For an acoustic guitar typically the rule of thumb is to put it pointing somewhere around the 12th fret of the guitar. Then once it’s ready you can just test a few chords to make sure the input is good again and just check that it sounds good on the headphones.
Step 7 - Start Recording the Guitar
So now you should now be ready to start recording. It's up to you what you want to record first, generally though you should start by recording the main rhythm instrument of the song. If I was only recording guitar and vocals, I would record the guitar first so that I know what key and rhythm to sing in.
Now it’s time to hit record and it should start recording. You can let it play for a few bars so you can get ready and get the tempo. Then you can just start playing away. Usually, within tracks, you can create different playlists or they might be called sub-tracks or something similar. This basically enables you to keep all of your different takes on one track and you can go through them afterwards and pick which take you like the best.

Step 8 - Recording a software instrument
One area that I haven’t really covered yet is software instruments. Software instruments give you a way to record a wide variety of virtual instruments without actually needing to have them in the studio with you. With virtual instruments, you can write an entire symphony without owning a single real instrument.
The easiest way to play these software instruments is by using a MIDI keyboard, like the one below.
All you need to do is plug the keyboard into your computer via a MIDI cable into your audio interface or using a USB cable from the keyboard into the computer.
To start using a software instrument you will need to create a new track but this time when you create a new track choose instrument track instead of an audio track and choose stereo instead of mono. Then you can choose the instrument sound by going to the 'mixer window'.
Above the track that you just created you will see an 'Inserts A-E' section. Click that section and then rollover Multichannel plug-in and then rollover instruments and click the instrument you want to use.

Once you have chosen the instrument sound you want you can start recording.
MIDI is basically, encoded messages, rather than acoustic sound waveforms. This means it’s possible to change the notes you’ve recorded. To do this double-click on the MIDI region, you will see the piano roll window appear which then enables you to move around the midi note events. This can be really handy for correcting mistakes or making edits to what you’ve played.
Step 9 - Start Recording the Singing / Vocals
Once you have enough takes with the guitar you can then start preparing to record vocals. You probably already made two audio tracks when you made the session so you have one all ready to go. We just need to do the same process of setting up the mic for the vocals.
Tip: If you are recording your vocals with a large diaphragm condenser microphone you’ll want to use a pop filter and sing about 6 inches/15cm minimum away from the mic. This will give you a more even level sounding vocal.
You can sing a few lines just to check the levels and you will need to adjust them as necessary so that they're in that sweet spot, between halfway up the level meter bar and three-quarters of the way up.
So now you can hit record and you should be hearing the guitar part and the click track now in your headphones so you can just sing along to that. You can do a few takes just so that you’re sure you have enough to choose from.
At this point, you might want to record some harmonies, so you can create a new audio track and it's just going to be the exact same process as before you’re going create a mono audio track. Again make sure the input is reading whatever input my microphone is in. You can record enable that track and now you should be hearing everything in your headphones that you’ve already recorded so I'll hear the click track the guitar and the vocals. So now you can record the harmonies over the top where you want them.
If you want more information on how to record vocals check out our How to Record Vocals Guide.
Ok, so now you should have everything recorded and that's basically everything you need to know in terms of the basics of how to record a song.


